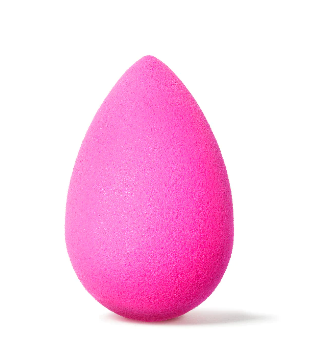
A makeup sponge is a perfection at first glance, but its pristine appearance quickly fades after a single use. The once-flawless neon egg transforms into a canvas of foundation stains and remnants of old eyeliner. Adding to the challenge is the inherent susceptibility of sponges to bacterial growth. Prolonged dampness serves as an invitation for mold to thrive. Considering that these sponges come into direct contact with your face, where bacteria may reside, maintaining cleanliness and dryness becomes paramount.
For those with acne-prone or sensitive skin, daily sponge cleaning is a non-negotiable ritual. The continuous use of any makeup tool inevitably leads to the accumulation of dead skin cells, dirt, oil, pollution, and bacteria. This revelation prompts a second thought before neglecting the crucial step of cleaning.
As a recommended practice, initiating the day with a thorough cleaning of your makeup sponge before makeup application proves beneficial. This routine serves a dual purpose: not only does it ensure a clean and disinfected makeup sponge for sensitive skin, but it also primes the sponge for immediate use. Consistently scrubbing your makeup brushes and sponges becomes an essential preventive measure against stubborn stains and undesirable bacteria proliferation. The question then arises: how can one achieve a spotless makeup sponge without compromising its integrity? Let's explore the various methods.
What Is A Makeup Sponge?
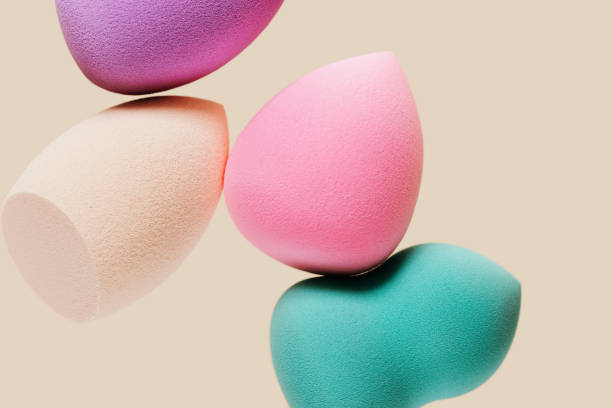
A makeup sponge is a beauty tool that helps apply liquid makeup products onto your skin, mostly used for blending in the foundations, concealers, and contours while doing your makeup. Using makeup sponges and beauty blenders helps achieve a smoother look to your makeup and natural skin as your makeup can blend well and don’t leave a cakey or smudge look when you blend well with a sponge.
These days you can actually find a wide variety in makeup sponges and not even one. There are different shapes, colors, and blending abilities that are specifically designed for a particular product application. And different shapes help with reaching those spots that are mostly ignored and don’t really get the full-coverage because you can't reach there or just don’t pay well attention to.
How To Clean Makeup Sponges
When it comes to how to clean makeup sponges, there are more than one way to do it. From using a shampoo to actually using the specific solution designed to clean makeup sponges it’s totally up to you what works best for you and most importantly how much time you have to give to the cleaning process. So, ahead are some ways you can clean your makeup sponges.
With A Shampoo
If it's suitable for your scalp, it's equally effective for your makeup sponge. Shampoo proves to be a fantastic solution for removing the buildup in your makeup sponge. Opt for a gentle formula designed for sensitive skin – baby shampoo or various organic options work well.
Begin by running your beauty sponge under lukewarm tap water until it expands to its full size. Apply a few drops of your chosen shampoo onto the sponge, gently rubbing it against your palm. Rinse the beauty blender under the tap, gently squeeze out excess liquid, and pat it dry with a paper towel. Mild dishwashing liquid or hand soap can also be used with this method.
In A Microwave
In 2018, a Twitter hack suggesting microwaving beautyblenders gained popularity for cleaning makeup sponges. While effective, it comes with risks. Microwaving the sponge in soapy water is a potent method, acting like a turbocharged washing machine that uses hot water and soap to cleanse fabrics, effectively eliminating microorganisms. Confuse about how to clean makeup sponges in a microwave? To use the microwave method follow these steps:
- Create a soapy water mixture by mixing mild soap (dish soap or baby shampoo) with water in a microwave-safe cup.
- Wet the sponge by giving it a few squeezes in the water, then fully submerge it in the cup.
- Microwave the cup for about a minute, allowing at least 30 seconds for it to cool before removing it. The soapy water will turn into liquid makeup residue.
- Wring out the sponge after the water cools, rinse it under running water, and set it aside to dry.
Caution: Avoid placing the dirty sponge directly on the microwave tray without the soapy water mixture, as it may result in a melted mess. Always keep a close eye on the sponge during microwaving.
With A Cleansing Pad

While gently scrubbing your beauty sponge with your hands is an option, a textured surface offers a more comprehensive clean. The BeautyBlender's textured silicone pad is specifically designed to effortlessly clean brushes and sponges. Slipping it over your hand provides a delicate yet effective cleaning method for your sponges.
With A Blender Cleanser
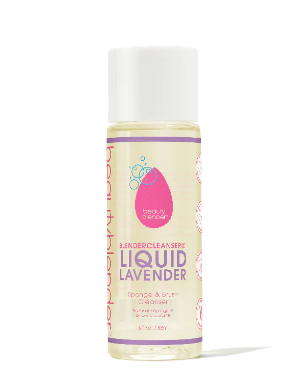
The creators of Beautyblender have developed two cleansers tailored to their beloved product to encourage users to maintain regular sponge cleaning. The Liquid Blendercleanser ($18) functions like any other cleanser—wet the sponge, apply the cleanser, and gently massage until the water runs clear, restoring your Beautyblender to its vibrant state. For stubborn stains, allow the soap to sit with the sponge for a few minutes to facilitate loosening.
With A Laundry Powder
In a viral video viewed over 8.5 million times, a beauty blogger shares a divisive beauty blender cleaning hack. In the video, she places six beauty sponges in a bowl, covers them generously with Vanish Oxi Advance Laundry Booster (a similar product available in Australia is used), and pours boiling water over them, resulting in a peculiar coffee-like mixture (not for consumption!). She then drains them through a sieve and rinses them thoroughly under water. This technique raises concerns about the safety of using laundry powder on the face, with some viewers recommending a second wash with a facial cleanser for added reassurance.
Do A Double Cleanse
If you've ever experienced the revitalizing effects of double-cleansing for your face, you'll appreciate the refreshing combination of an oil-based cleanser with a water-based one. The fundamental principle at play is that oil dissolves oil. When faced with a full makeup look, starting with a cleansing oil can effectively break down the oils present in the makeup. This technique is equally beneficial for heavily makeup-laden sponges. Begin with a dry sponge, massaging a few drops of oil (coconut oil is a great choice) into the sponge until the makeup begins to dissolve. Follow up with soaking it in a cup of soapy water, as described earlier – this serves as the second part of the double cleanse. It not only eliminates any lingering traces of makeup but also aids in rinsing off any oily residue. Dry the sponge thoroughly in a well-ventilated space, ensuring it's propped up to allow free air circulation.
With A Dishwashing Soap
For an effective yet gentle cleansing method, one of our editors swears by using dishwashing soap for her makeup sponges. This type of soap is mild enough to avoid damaging the sponge while being a potent degreaser that effortlessly breaks down foundation and concealer. Create a warm, sudsy solution using a grease-cutting dish liquid like Dawn. Apply a dime-size amount of soap to the sponge, adding a squirt of Dawn directly for extra lather and to tackle any stains. Massage the blender for 60 seconds, working the soap into the sponge with your fingers. Allow it to soak in the sudsy water for a few minutes, then squeeze it again before rinsing thoroughly until no suds remain and the water runs clear. Gently roll the sponge on a clean towel to remove excess moisture, and lay it flat to dry completely.
What To Consider Before Washing Your Makeup Sponges
Commence your sponge-cleaning journey by understanding the delicate process that preserves its integrity. The crucial element lies in steering clear of aggressive cleansers and treating your Beauty Blender with extra tender loving care. A highly recommended choice is The Liquid Blendercleanser from beautyblender, specially formulated for effective use on both sponges and blenders. When wringing out the sponge, exercise caution against excessive rubbing or vigorous scrubbing; instead, opt for a gentle squeeze to maintain its pristine condition.
How To Wash Makeup Sponges
Follow this step-by-step guide for washing your makeup sponges:
- Apply cleanser: After completing your skincare routine and applying makeup, add a squirt of soap to your soiled makeup sponge.
- Massage: Run the sponge under water to generate suds, and massage the soapy water into the sponge by gently working it in the palm of your hand for ten to fifteen seconds.
- Rinse: Eliminate soap and product buildup by rinsing the makeup sponge under running water or in a small bowl of warm water. Squeeze it out several times until it is free of soap, avoiding wringing to preserve its shape.
- Double cleanse (optional): For stubborn stains or spots, repeat the cleansing and massaging process to double-cleanse your makeup sponge. Alternatively, let the sponge soak in warm, soapy water for ten to fifteen minutes to aid in breaking down remaining products.
- Dry: Allow your makeup sponge to air-dry in an open area or on a clean towel before returning it to your makeup bag.
How Often To Wash Your Makeup Sponges
It's crucial to clean your Beauty Blender after each use for two compelling reasons. Firstly, there's the matter of hygiene. A soiled Beauty Blender or makeup sponge can become a breeding ground for various germs and bacteria, posing a risk of transferring these onto your skin with every application. Secondly, an unclean sponge is less effective; when coated with layers of old foundation, it can alter the color of any products you apply.
How Often To Replace Makeup Sponges
It's advisable to replace your makeup sponges every two to three months, particularly with daily use. If regular washing is neglected, consider replacing them every three to four weeks. To determine when it's time for a replacement, watch for signs such as a rotten or moldy smell, stiffness, difficulty in rinsing clean, or visible rips and tears.
Wrap Up
While washing your makeup sponges daily is ideal, a weekly routine serves as a reliable alternative. Utilize your preferred cleanser, be it liquid dish soap, bar soap, gentle antibacterial shampoo, face cleanser, or specialized makeup cleanser, to restore your makeup sponge to a like-new condition. Ultimately, maintaining clean sponges ensures seamless makeup application and reduces the risk of skin breakouts, irritations, rashes, and sensitivities.